Kenmore Sewing Machine Model 385: A Comprehensive Owner’s Manual Guide
This detailed manual offers operating instructions for the Kenmore 385 sewing machine, ensuring safe and effective use for all sewing enthusiasts.
Welcome! This manual serves as your comprehensive guide to the Kenmore Model 385 sewing machine. Designed for both beginners and experienced sewers, this machine offers a blend of reliability and functionality. This guide provides detailed instructions, safety precautions, and troubleshooting tips to maximize your sewing experience.
The Kenmore 385 is a versatile machine capable of handling a wide range of fabrics and projects. Understanding its features and proper operation, as outlined within this manual, will unlock its full potential. We aim to empower you with the knowledge to create beautiful and lasting projects. Explore the diagrams and instructions carefully!
Safety Precautions
Prioritize safety! Always disconnect the power cord before cleaning, changing the needle, or performing any maintenance. Never operate the machine with a damaged cord or plug. Keep fingers away from moving parts, especially the needle and presser foot, during operation.
Avoid sewing over pins; they can damage the needle and machine. Do not force the fabric under the needle. Ensure the machine is stable and on a level surface before use. Supervise children when near the sewing machine. Regularly inspect all parts for wear and tear. Following these precautions ensures a safe sewing experience.
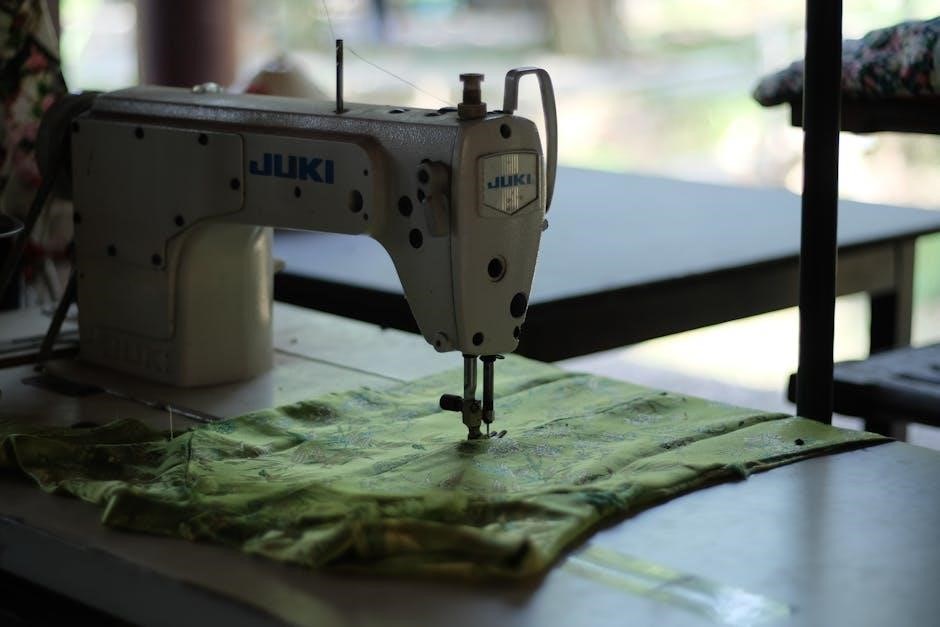
Machine Overview & Parts Identification
Familiarize yourself with your Kenmore 385! This machine features a robust motor, a selection of stitch patterns, and adjustable settings for versatile sewing. Key components include the power switch, handwheel, stitch length dial, stitch width dial, needle clamp, presser foot, and bobbin winder.
Locate the front and rear panels, understanding their respective controls and features. The bobbin case resides beneath the needle plate. A detailed parts diagram (available separately) illustrates each component’s location and function, aiding in proper operation and maintenance.
Front Panel Controls
The Kenmore 385’s front panel houses essential controls. The power switch initiates operation, while the handwheel allows manual needle positioning. Stitch selection dials govern pattern choice – straight, zigzag, and potentially others. Stitch length and width dials refine stitch appearance. A reverse lever enables backstitching for secure seams.
The thread tension dial adjusts pressure on the upper thread, crucial for balanced stitches. Observe these controls carefully; proper adjustment ensures optimal sewing performance and prevents issues like thread breakage or skipped stitches. Refer to the diagrams for precise locations.
Rear Panel Features
The Kenmore 385’s rear panel contains vital components for operation and maintenance. Locate the main power input for connecting the machine to a power source. A fuse holder protects against electrical surges – always use the correct amperage replacement. The handwheel shaft provides access for manual control.
Additionally, you’ll find access points for internal lubrication and potential belt adjustments. Inspect these areas regularly for dust accumulation or wear. Proper maintenance of these rear panel features ensures the longevity and smooth functioning of your Kenmore sewing machine.
Bobbin Winding Mechanism
The Kenmore 385 features a straightforward bobbin winding system. Begin by placing the thread spool on the spool pin. Guide the thread through the tension disc, ensuring a snug fit for even winding. Next, thread the end through the bobbin winder spindle.
Secure the bobbin onto the spindle and engage the winding mechanism by pushing the bobbin winder to the right. Gently press the foot pedal to start winding; the machine will automatically stop when full. Consistent winding is crucial for stitch quality.
Setting Up Your Machine
Preparing your Kenmore 385 for operation is a simple process. First, ensure the machine is placed on a stable, level surface. Connect the power cord to a grounded outlet. Before threading, verify the presser foot is raised to release tension.
Proper setup includes installing a suitable needle for your fabric type and winding a bobbin with matching thread. Familiarize yourself with the front and rear panel controls before beginning. Always consult the manual for specific guidance on initial setup procedures.
Powering On and Off

To power on your Kenmore 385, locate the power switch, typically found on the machine’s right side or rear panel. Ensure the switch is in the “Off” position before plugging in the power cord. Once connected to a grounded outlet, flip the switch to “On”.
The machine is ready when the light illuminates. To power off, return the switch to the “Off” position and unplug the machine when not in use for extended periods. This conserves energy and ensures safety.
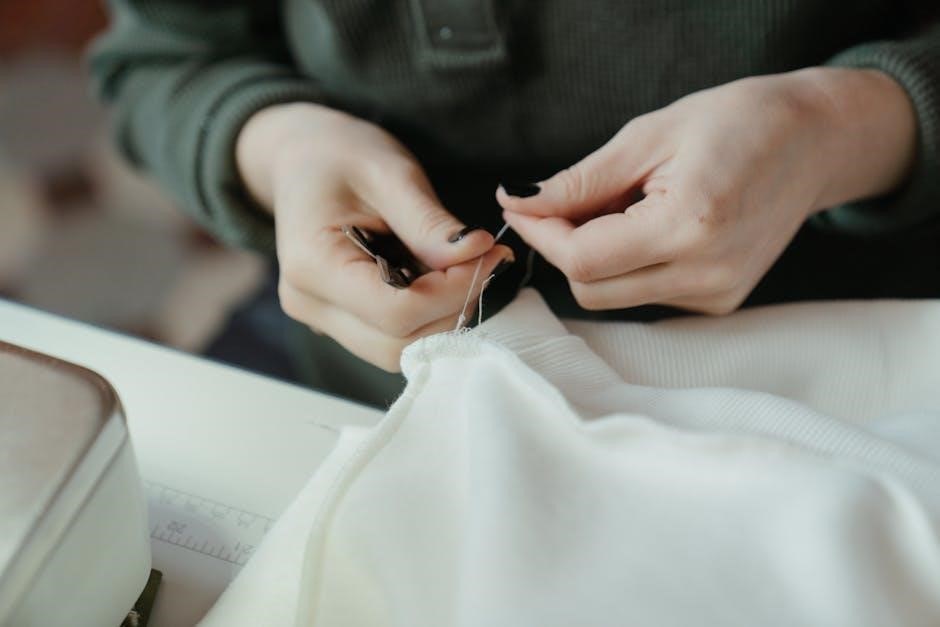
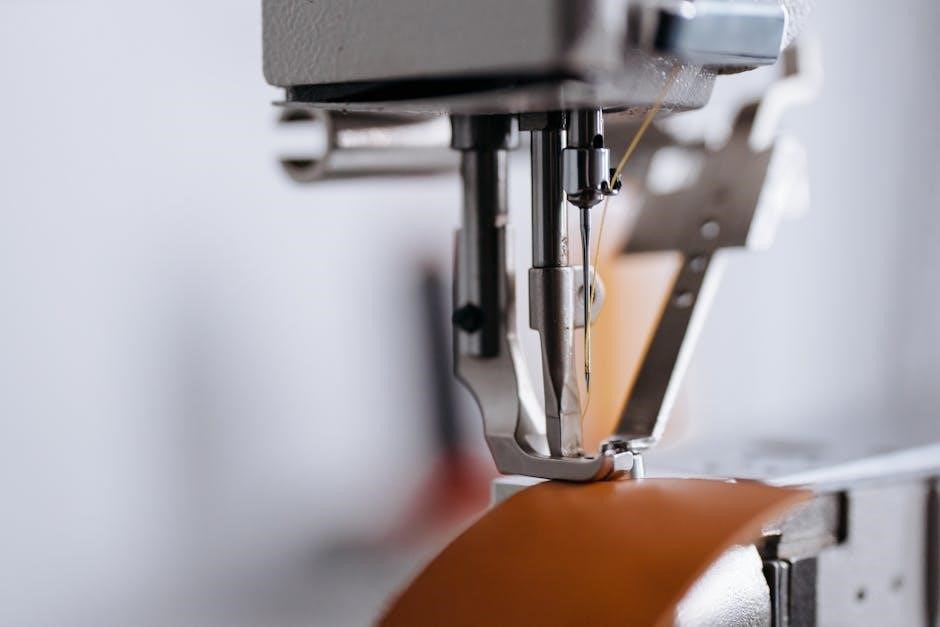
Threading the Upper Thread
Begin by raising the presser foot and ensuring the needle is in its highest position. Place the spool of thread on the spool pin. Guide the thread through the first thread guide, then down and around the tension discs.
Continue threading upwards through the take-up lever, then down through the needle clamp. Finally, thread the needle from front to back. A proper threading path is crucial for consistent stitch formation and preventing thread breakage.
Threading the Lower Thread (Bobbin)
Begin by placing the spool of thread on the spool pin and winding the bobbin. Ensure the bobbin is wound evenly and not too full. Once wound, locate the bobbin case and insert the bobbin, ensuring it rotates in the correct direction as indicated by the arrow on the machine.
Draw up the bobbin thread by gently holding the upper thread and turning the handwheel towards you. A properly threaded bobbin is essential for creating balanced and secure stitches.
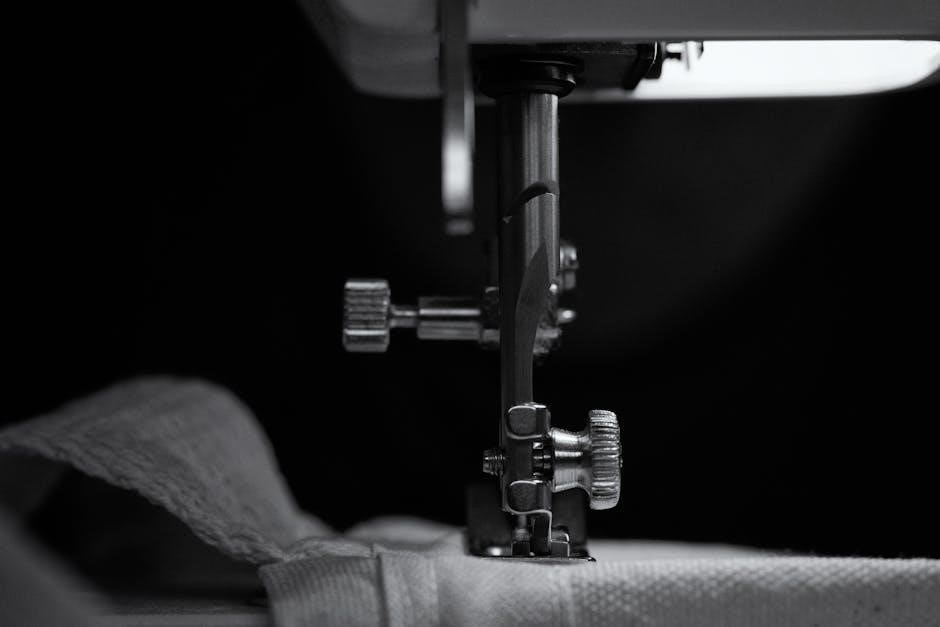
Inserting the Bobbin
To insert the bobbin, open the bobbin case cover located beneath the needle plate; Gently place the wound bobbin into the bobbin case, ensuring the thread unwinds in a clockwise direction, following the arrow indicator. Guide the thread through the tension slot of the bobbin case.
Carefully reinsert the bobbin case into the machine, ensuring it clicks securely into place. Draw up a few inches of the bobbin thread through the opening; this prepares the machine for threading.
Bobbin Tension Adjustment
Proper bobbin tension is crucial for balanced stitches. If stitches appear loose or puckered on the underside of the fabric, adjust the bobbin tension screw. Turning the screw clockwise increases tension, while counterclockwise decreases it.
Test the tension on a scrap of fabric after each adjustment. Aim for a balanced stitch where the top and bobbin threads interlock evenly within the fabric layers. Minor adjustments are usually sufficient to achieve optimal results.
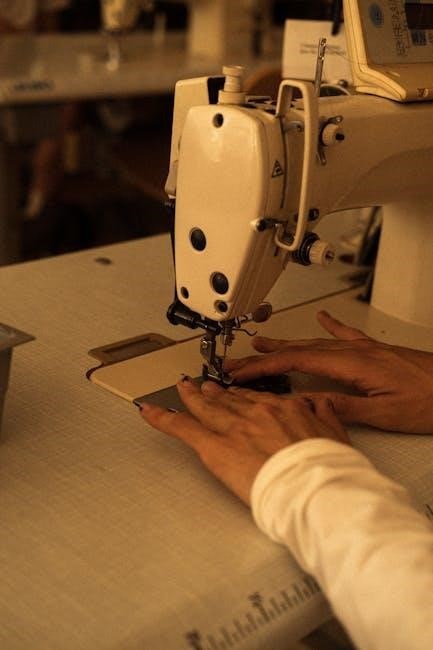
Basic Sewing Techniques
Mastering fundamental techniques unlocks the Kenmore 385’s potential. Begin with straight stitching, guiding the fabric smoothly under the presser foot while maintaining a consistent speed. Next, explore zigzag stitching for finishing raw edges or creating decorative elements.
Experiment with adjusting stitch length and width using the corresponding dials. Shorter stitches are ideal for delicate fabrics, while longer stitches suit heavier materials. Practice these basics to build confidence and achieve professional-looking results.
Straight Stitching
The foundation of sewing, straight stitching on the Kenmore 385 requires practice. Ensure the presser foot is lowered and select a straight stitch setting. Gently guide the fabric, keeping the edge aligned with the desired seam allowance. Maintain a consistent, moderate speed for even stitches.
Avoid pulling or pushing the fabric; let the machine feed it naturally. Practice on scrap fabric to refine your technique before tackling your project. Consistent pressure and a steady hand yield the best results.
Zigzag Stitching
The Kenmore 385’s zigzag stitch offers versatility for various applications. Select the zigzag stitch setting and adjust the stitch width using the designated dial. A narrower width creates a denser stitch, ideal for reinforcing seams, while a wider width is suitable for decorative edges and stretch fabrics.
Practice on scrap fabric to understand the effect of different width settings. Maintain a consistent speed and guide the fabric smoothly. Zigzag stitching prevents fabric fraying and adds decorative flair to projects.
Adjusting Stitch Length and Width
Precise stitch control is key with the Kenmore 385. Utilize the stitch length dial to modify the distance between stitches; shorter lengths strengthen seams, while longer lengths are suited for basting or gathering. The stitch width dial controls the side-to-side deviation of stitches, crucial for zigzag and decorative patterns.
Experiment with different settings on scrap fabric to achieve desired results. Remember, fabric type influences optimal settings – lighter fabrics require shorter lengths and narrower widths.
Advanced Stitching Options
The Kenmore 385 expands beyond basic stitches, offering versatility for diverse projects. Explore the buttonhole stitch function, creating professional-looking buttonholes with adjustable size settings. Depending on the model, an overlock stitch may be available, providing a secure, finished edge to prevent fabric fraying – ideal for knit fabrics and garments.
Consult the stitch pattern guide for detailed instructions on utilizing these advanced features. Practice on scrap fabric to master each stitch before applying it to your final project.
Buttonhole Stitching
The Kenmore 385 simplifies buttonhole creation with its dedicated buttonhole stitch. Begin by attaching the buttonhole presser foot. Select the buttonhole stitch setting and adjust the desired buttonhole length using the control dial – matching it to your button size is crucial. Position your fabric and carefully lower the presser foot.
The machine will automatically stitch around the buttonhole opening. Always test on scrap fabric first to ensure proper sizing and stitch quality before working on your garment.

Overlock Stitching (if applicable)
Determine if your Kenmore 385 model includes an overlock stitch setting; not all variations feature this capability. If present, the overlock stitch provides a professional finish, preventing fabric fraying. Select the overlock stitch on the stitch selection dial and ensure the appropriate presser foot is attached – often a specialized overlock foot.
Adjust stitch width for desired seam allowance. Practice on scrap fabric to master tension and achieve a clean, durable overlocked edge. This stitch is ideal for knit fabrics and garment construction.
Needle Selection and Replacement
Choosing the correct needle is crucial for optimal sewing performance with your Kenmore 385. Universal needles suit most woven fabrics, while ballpoint needles are best for knits, preventing runs and snags. Denim needles tackle heavier materials like jeans. To replace the needle, always power off the machine. Loosen the needle clamp screw, remove the old needle, and insert a new one with the flat side facing the back.
Retighten the screw securely. Regularly changing the needle ensures clean stitches.
Needle Types for Different Fabrics
Selecting the appropriate needle significantly impacts stitch quality on your Kenmore 385. Universal needles (size 80/12, 90/14) work well on lightweight to medium-weight woven fabrics. For stretch or knit fabrics, utilize ballpoint/stretch needles (size 75/11, 90/14) to avoid skipped stitches. Denim needles (size 90/14, 100/16) are designed for heavier fabrics like denim and canvas. Leather needles create clean holes in leather. Metallic needles are ideal for metallic or delicate fabrics, preventing puckering.
Changing the Needle
To replace the needle on your Kenmore 385, ensure the machine is off. Loosen the needle clamp screw using the screwdriver included with your machine. Gently pull the old needle upwards. Insert the new needle, with the flat side facing the back of the machine, and push it up as far as it will go. Tighten the needle clamp screw securely. Always use the correct needle type for your fabric to prevent damage and ensure optimal stitch quality;
Presser Feet: A Guide
Your Kenmore 385 comes equipped with various presser feet for specialized sewing tasks. The standard foot is ideal for everyday stitching. A zipper foot facilitates close-edge stitching along zippers. The buttonhole foot automates buttonhole creation, ensuring consistent results. Correct presser foot selection is crucial for achieving professional-looking seams and decorative effects. Refer to the manual for detailed instructions on attaching and utilizing each presser foot. Experiment with different feet to unlock the full potential of your sewing machine.
Standard Presser Foot
The standard presser foot, included with your Kenmore 385, is your go-to for most general sewing applications. It’s designed for straight stitching, zigzag stitching, and a wide range of fabrics. Ensure the foot is securely attached before beginning any project. Proper foot pressure is essential for even fabric feed; adjust as needed. This versatile foot provides consistent control and is perfect for beginners and experienced sewers alike. Regularly inspect the foot for damage and replace if necessary to maintain optimal sewing performance.
Zipper Presser Foot
The Zipper Presser Foot for your Kenmore 385 simplifies installing zippers with precision and ease. This foot features grooves on the underside, guiding the zipper teeth for a neat, professional finish. It’s ideal for both standard and invisible zippers. Attach the foot securely, aligning the groove with the zipper coil. Sew slowly and steadily, keeping the zipper teeth within the groove. Proper alignment prevents skipped stitches and ensures a smooth, even seam. Regularly check the foot for wear and tear, replacing it when needed.
Buttonhole Presser Foot
The Buttonhole Presser Foot for the Kenmore 385 enables you to create perfectly sized buttonholes effortlessly. This specialized foot works in conjunction with the machine’s buttonhole settings. Ensure the correct foot is attached before selecting the buttonhole stitch. Position the fabric carefully, aligning the buttonhole placement mark with the foot’s guide. Sew slowly, allowing the machine to complete the buttonhole sequence automatically. Regularly inspect the foot for damage and clean it to prevent fabric buildup. Practice on scrap fabric first to master the technique.
Troubleshooting Common Issues
Addressing common problems ensures your Kenmore 385 operates smoothly. Thread breakage often stems from incorrect threading or a dull needle; re-thread and replace the needle. Skipped stitches indicate incorrect needle size for the fabric or improper threading – adjust accordingly. If the machine jams, stop immediately, remove the fabric, and check for tangled thread in the bobbin area. Always unplug the machine before clearing jams. Regularly cleaning and oiling prevent many issues. Consult the manual for specific error codes or further assistance.
Thread Breakage
Frequent thread breakage with your Kenmore 385 often points to a few key issues. First, meticulously re-thread the upper thread, ensuring it’s properly seated in all guides and the tension disc. A dull or damaged needle is a common culprit; replace it with a new, appropriate needle for your fabric. Incorrect thread tension – too tight – can also cause breaks. Finally, verify you’re using a quality thread compatible with your machine. Always unplug before making adjustments.
Skipped Stitches
If your Kenmore 385 is skipping stitches, begin by replacing the needle – a bent or dull needle is a frequent cause. Ensure the needle is correctly inserted, with the flat side facing the correct direction. Check the thread path for obstructions and confirm the upper thread is properly tensioned. Using the wrong needle type for your fabric can also lead to skipped stitches. Finally, verify the timing belt isn’t loose or damaged, as this impacts stitch formation. Always unplug before inspection.
Machine Jamming
Should your Kenmore 385 sewing machine jam, immediately stop and disconnect the power. Do not force the mechanism! Carefully remove the bobbin case and check for tangled threads or fabric pieces. Inspect the needle area for any obstructions. Ensure the presser foot is raised to release tension on the fabric. Re-thread both the upper and lower threads, verifying correct threading paths. A buildup of lint and dust can also cause jamming, so regular cleaning is crucial for smooth operation.
Maintenance and Cleaning
Regular maintenance ensures your Kenmore 385 operates smoothly. Always disconnect the power before cleaning! Remove the needle and bobbin case. Use a soft brush to remove lint and dust from the bobbin area and feed dogs. Periodically oil the machine, focusing on moving parts as detailed in the manual. Wipe down the exterior with a damp cloth. Avoid using liquid cleaners directly on the machine. Consistent cleaning prevents jamming and extends the lifespan of your Kenmore 385 sewing machine, guaranteeing years of reliable service.
Oiling the Machine
Proper lubrication is vital for the Kenmore 385’s performance. Disconnect power before oiling! Apply a few drops of sewing machine oil to the bobbin case race, hook assembly, and all visible moving parts. Focus on areas indicated in the parts diagram. Use a needle-nose oiler for precision. Wipe away any excess oil to prevent staining fabric. Avoid over-oiling, as it attracts dust. Regular oiling – every few sewing sessions – ensures smooth operation, reduces friction, and prolongs the life of your Kenmore 385 sewing machine.
Dust Removal
Regular dust removal is crucial for maintaining your Kenmore 385. Always disconnect the power cord before cleaning! Use a soft brush or the brush attachment of your vacuum cleaner to gently remove lint and dust from the bobbin area, feed dogs, and other internal components. A small piece of fabric dipped in rubbing alcohol can clean hard-to-reach spots. Avoid using compressed air, as it can push dust deeper into the machine. Consistent cleaning prevents jamming and ensures optimal sewing performance for your Kenmore 385.
Belt Replacement
Replacing the belt on your Kenmore 385 requires careful attention. First, disconnect the power! Access the belt by removing the rear panel cover. Note the belt’s routing before removal for correct reinstallation; Gently ease the old belt off the motor pulley and handwheel. Ensure the new belt is the correct size and type for your model. Carefully position the new belt, ensuring a snug fit around both pulleys. Reattach the rear panel, and test the machine’s operation. A broken belt prevents power transmission, halting sewing functionality.
Motor Maintenance
Proper motor maintenance extends the life of your Kenmore 385. Regularly check the motor brushes for wear; replace them when significantly shortened. Dust accumulation inside the motor can cause overheating, so periodic cleaning is crucial. Never attempt to oil the motor unless specifically instructed – incorrect lubrication can cause damage. Ensure the motor ventilation slots are unobstructed for efficient cooling. Listen for unusual noises during operation, which may indicate a problem. A well-maintained motor ensures smooth, reliable sewing performance for years to come.
Understanding Stitch Patterns
The Kenmore 385 offers a variety of stitch patterns for diverse projects. Straight stitches are fundamental for seams, while zigzag stitches provide stretch and finishing. Explore decorative stitches for embellishment. Stitch length controls density; shorter for delicate fabrics, longer for heavier materials. Stitch width adjusts zigzag breadth. Refer to the stitch pattern guide included with your machine to understand each stitch’s purpose and optimal settings. Experimenting with different patterns expands your creative possibilities, ensuring professional-looking results on every sewing endeavor.
Kenmore Model 385 Specific Features
The Kenmore 385 boasts several features enhancing the sewing experience. It includes adjustable stitch length and width for customization, alongside a built-in bobbin winding system for efficiency. A selection of presser feet caters to various fabrics and techniques. The machine’s robust motor handles diverse materials with ease. Its compact design allows for convenient storage. Detailed diagrams within the manual illustrate specific parts and functions. These features combine to deliver a reliable and versatile sewing solution for both beginners and experienced users.
Accessing Additional Resources
For further assistance with your Kenmore 385, numerous resources are readily available. Online manuals and support forums offer troubleshooting tips and frequently asked questions. The Kenmore customer service team provides direct support via phone or email, addressing specific concerns. Websites dedicated to sewing machines often host user manuals and parts diagrams. Exploring these platforms can unlock valuable insights and solutions. Remember to have your model number handy when contacting support or searching online for relevant information.
Online Manuals and Support
Numerous websites provide access to Kenmore 385 sewing machine manuals in digital format. Searching online using keywords like “Kenmore 385 user manual” quickly yields results. These resources often include downloadable PDFs for convenient offline access. Support forums dedicated to sewing machines are invaluable for troubleshooting and sharing experiences with other users. Many platforms host parts diagrams and instructional videos, enhancing understanding. Remember to verify the source’s reliability before downloading any files or following advice found online.
Kenmore Customer Service
For direct assistance with your Kenmore 385 sewing machine, contacting Kenmore customer service is recommended. While specific contact details may vary, searching the official Kenmore website provides current phone numbers and email addresses. Be prepared to provide your model number (385.16765 is common) when contacting support. Online chat options may also be available for quicker assistance. Customer service representatives can help with troubleshooting, parts inquiries, and warranty information, ensuring a positive ownership experience.
Parts Diagram
A comprehensive parts diagram is essential for identifying components during maintenance or repair of your Kenmore 385 sewing machine. These diagrams, often found within the full owner’s manual or available online, visually represent each part with corresponding numbers or labels. This allows for accurate ordering of replacement parts when needed. Diagrams typically showcase the machine’s internal mechanisms, presser feet, bobbin area, and exterior components, facilitating easier troubleshooting and upkeep for a long-lasting sewing experience.